Description
AXE OR HATCHET – CHOOSING THE RIGHT TOOL?
What is the difference?
If the tool can be wielded with one hand with minimal effort we speak of it as a hatchet. When two hands are required to wield the tool properly and safely we then class this as an axe.
Hatchets are usually lighter and have a shorter length handle than an axe. Because of this, hatchets have comparatively longer blade lengths to create tool power. Hatchets are never heavier than 1kg (1000g) whereas axes are usually between 800g and 1.6kg (1600g). Due to the weight, a user naturally operates an axe safer with two handed wielding.
Shapes & Function
Axes aren’t ‘just an axe’. The axe head functions differently depending on its curvature and shape. Working with the right tool will enhance your experience. Check out our axe head profile pic for a good illustration.
- A normal shape, often referred to as a universal shape, has a curvature and shape of axe head that makes it usable as an all-rounder for easy chopping, splitting and garden work.
- A forest axe has an extra slim profile forged especially for precision work such as cutting down trees. The curvature of the axe head is ground to a high sharpness.
- A splitting axe has a crowned shape that exerts force outwards. This shape makes splitting easier for maximum splitting power with minimal effort.
- Security wedging for all axes and hatchets is crucial for safety and product longevity. A wooden wedge combined with two round steel wedges achieve a connection that can withstand much higher pulling torques.
Splitting & Trimming
Interesting fact – always pay close attention to the type of axe you are using. Due to the diverse shapes not all axes are useful for splitting. For example a ‘Forest Axe’ forged profile axe head is not suitable for splitting wood and might even be damaged in the process. In the same way, a splitting axe is not useful for chopping and trimming wood. Refer to our axe shape guidance when selecting an axe or check the product descriptions.
Splitting Wood
- Split the wood immediately after it’s been cut down, as fresh wood is easier to split than older wood that can become tough and hardened over time.
- Use a base that is about knee height and positioned securely on a flat surface.
- Use a wide stance and make sure that the swing direction of the axe is not directed at your legs at any point.
- Grab the axe with both hands. During impact with the wood the forehand on the handle slides back toward the end of the handle so that both hands are near the end of the axe to exert the most amount of force when the blade hits the wood.
- In order to split wood as easily as possible, try splitting along already formed cracks. Large pieces of wood usually require multiple blows until they split. Always split large pieces of wood from out to in. Inner wood rings are compact and tough to split without removing outer wood.
- If the axe gets stuck in the wood we recommend using an additional wedge and a hammer. If the wood is relatively small then just flip it and the axe around and hit the axe on its back. The wood usually splits then. Don’t ever try to lever the axe out by moving it from side to side because that can loosen the head from the handle.
Trimming Trees
- Always trim twigs and branches away from your body, caution must be taken and relevant personal protective equipment worn.
- Trim branches and twigs in the direction of growth (from bottom to top) because cutting with the grain is easier and cuts quicker.
- Caution when trimming overhead, in case of overhead lines and wires.
Axe Maintenance
Axes are very long-lasting tools that don’t require a lot of maintenance. However, a few little tricks can greatly extend the lifespan of your axe.
Before storing the axe for a long period of time or through a season, the blade should be lightly greased to prevent corrosion on the surface. Axes keep best when stored at normal humidity. If the wood dries out, it shrinks and looses it’s ability to flex and absorb vibrations. Similarly, too humid conditions can harm the wood. Never soak a loose handle in water to re-attach it to the head, instead, seek professional assistance.
Re-grinding the cutting edge
- Properly re-grinding the cutting edge requires some practice. Should you not be sure about grinding the blade, leave it to a professional. Unsuitable treatment of the cutting-edge can ruin the entire axe.
- Grinding the blade manually achieves the best results. Electrical appliances such angle grinders, or belt grinders take away too much material due to their high rpm’s. Furthermore, the head can heat up which weakens the tempering of the steel. This happens before the steel visibly changes color and renders the axe useless.
- Always grind the axe according to its intended area of use and try to maintain the original shape and grind angle.
- Remove larger damages with a file at first. In doing so the radius and shape of the cutting edge cannot change, because otherwise the entire edge needs to be reworked.
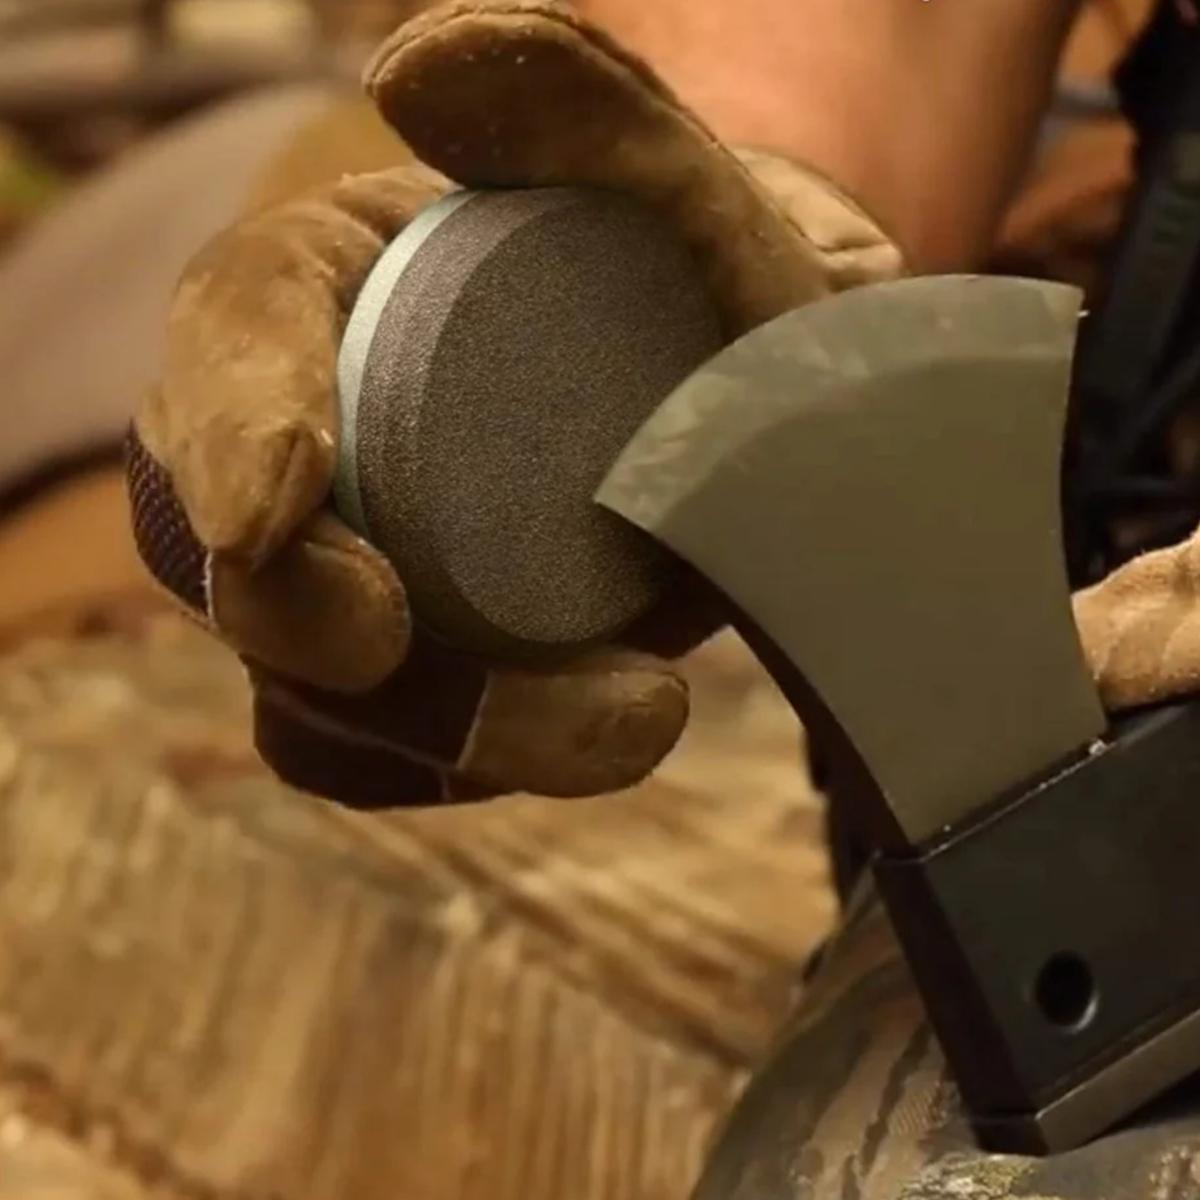
- Afterwards, pick a grindstone, typically a sharpening grinding stone will have two grit surfaces. The difference of the granulation of the surface gives the ability to grind coarse burrs and reshape the axe, whilst the smoother edge allows for the axe face to be smoothly polished.
- Grind the cutting edge with the coarse side of the stone until the original shape is retained.
- Then sharpen the blade with the finer side of the stone and polish away the scratches that the coarse grind may have created. Applying some grease to the surface will help create a smoother finish.
- The cutting edge needs to be exactly centered and ground evenly on both sides. An uneven edge will ruin the axe and cause bowing when chopping.
Changing Handles
- It is recommended that as soon as the handle begins to wobble or is damaged it should then be changed.
- Only use original handles with the wood and ring wedge connection. This wedging is designed specifically to work with the axe head and handle to enable a tight and secure fit.
- Do not soak the handles in water to re-attach them to the heads. This is a common myth that has proven very unreliable and thus dangerous.
- First, remove the old handle by cutting it off directly under the axe-head. Remove the remaining wood out of the cavity in the head using a chisel and/or a drill. Clean the inside of the cavity thoroughly.
- The new handle has to be fixed firmly to the head. Therefore, don’t sand down the top of the handle (which would make sliding the head on easier).
- Place the axe head firmly on it’s back so that the cavity faces up. Line the handle up to the cavity and drive it into the cavity using a hammer. Afterwards, drive the wooden wedge into the top of the cavity before finally securing it with steel ring wedges for a superior connection.
Safety at work
- Always wear protective personal safety clothing and equipment.
- Keep sharp tools away from children.
- Ensure all axe work is carried out in a safe environment.
This guide is intended to give information and advice only. It is the user’s responsibility to ensure necessary training and experience is achieved to use an axe or hatchet safely.


